Workshop: Fix a GitHub Issue with a Remote Agent — No Editor Required
A practical walkthrough of how to assign a GitHub issue to a remote AI agent, let it plan and write the fix, and merge the resulting pull request — all from the browser.
In the previous article we talked about what agents really are, how they differ from chat, and where they live. Now it’s time to get our hands dirty.
This is a workshop. By the end of it you will have assigned a real GitHub issue to a remote AI agent, watched it plan and write the fix, and reviewed the pull request it opened — without touching your terminal or your editor once.
What We’ll Build
A developer workflow that looks like this:
- You spot a bug or open an issue on GitHub.
- You assign it to an AI agent from the browser.
- The agent reads the repo, understands the problem, and writes the fix.
- A pull request appears. You review and merge.
That’s it. No git clone. No local environment. No editor open.
1. What Are Remote Agents?
When people talk about AI agents they usually imagine something running on their machine — the IDE plugin that suggests code, the CLI tool that executes commands in your terminal. These are local agents: they live in your development environment and act on your behalf there.
Remote agents are different. They run in a hosted environment managed by the AI provider. Instead of your machine, they work inside a sandboxed cloud runtime that has access to your repository (and whatever other tools you grant them). You interact with them through a web interface, an API, or — as we’ll see — by assigning a GitHub issue.
The distinction matters for a few reasons:
| Local agent | Remote agent | |
|---|---|---|
| Where it runs | Your machine | Provider’s cloud |
| Requires your laptop to be on | Yes | No |
| Access to local files/env | Yes | Only what you grant |
| Good for | Interactive coding, refactoring, complex exploration | Async tasks, bug fixes, PRs while you’re away |
| Example tools | Claude Code, Cursor, Copilot | Claude.ai (Projects + GitHub integration) |
Remote agents are not a replacement for local agents — they’re a complement. For discrete, well-scoped tasks like fixing a bug described in an issue, they shine: you delegate, step away, and come back to a PR.
2. Prerequisites
Before we start, make sure you have:
An Anthropic API key. The GitHub Action calls Claude directly via the API. You can get one from console.anthropic.com. Note that API usage is billed separately from any Claude.ai subscription.
A GitHub account with a repository. You need to be the owner or admin of the repo — you’ll be installing a GitHub App and adding repository secrets.
A GitHub issue to fix. It can be an existing bug or one you create specifically for this exercise. We’ll cover what makes a good issue description in section 4.
That’s it. No local tooling required during the actual fix — but we’ll need Claude Code briefly for the one-time setup.
3. Setting Up the GitHub Integration
This is a one-time setup per repository. Once done, you can trigger Claude on any issue with a single comment.
Step 3.1 — Install the Claude GitHub App
Go to github.com/apps/claude and install the app on your repository. The app requests three permissions:
- Contents: read & write (to edit files and commit changes)
- Issues: read & write (to read issue descriptions and post comments)
- Pull requests: read & write (to open PRs)
Select the specific repository you want to use — there’s no need to grant access to all your repos.
Step 3.2 — Add your API key to repository secrets
In your repository, go to Settings → Secrets and variables → Actions and create a new secret:
- Name:
ANTHROPIC_API_KEY - Value: your API key from console.anthropic.com
Step 3.3 — Add the workflow file
Create the file .github/workflows/claude.yml in your repository with this content:
name: Claude Code

on:
  issue_comment:
    types: [created]
  pull_request_review_comment:
    types: [created]
  issues:
    types: [opened, assigned]

permissions:
  contents: write
  pull-requests: write
  issues: write
  id-token: write

jobs:
  claude:
    if: github.event.comment.user.type != 'Bot'
    runs-on: ubuntu-latest
    steps:
      - uses: actions/checkout@v4
        with:
          fetch-depth: 0
      - uses: anthropics/claude-code-action@v1
        with:
          anthropic_api_key: ${{ secrets.ANTHROPIC_API_KEY }}
This workflow activates in three scenarios: when someone comments on an issue or PR, and when an issue is opened or assigned. Claude only acts when it sees a @claude mention — so just adding this file won’t trigger anything until you ask it to.
Commit the file directly to your main branch. The setup is done.
4. Creating a Good Issue and Assigning the Agent
A remote agent reads your issue the same way a new team member would: cold, without prior context. The quality of the issue directly determines the quality of the fix.
What makes a good issue for an agent
A useful issue for a remote agent has three things:
1. A clear description of the problem — not just “button doesn’t work” but what happens, when it happens, and what was expected instead.
2. Steps to reproduce (if it’s a bug) — the agent can’t run the app interactively, but having the reproduction steps written out helps it trace the code path.
3. Acceptance criteria — one or two lines describing what “fixed” looks like. This gives the agent a target to validate against.
Example of a well-written issue:
Title: Navbar link to #contact scrolls past the section on mobile

**What happens:**
On screens narrower than 640px, clicking the "Contact" link in the navbar
scrolls the page but lands about 80px above the section heading.

**Expected:**
The section heading should be visible at the top of the viewport after scrolling.

**Likely cause:**
The fixed navbar height is not accounted for in the scroll offset on mobile.
The desktop version works correctly.

**Acceptance criteria:**
- Clicking the Contact link on mobile (≤640px) positions the section heading
  correctly below the navbar.
- Desktop behaviour is unchanged.
Triggering the agent from GitHub
With the workflow in place, triggering Claude is as simple as leaving a comment on the issue. Mention @claude and describe what you want:
@claude fix this issue
Or be more specific:
@claude the scroll offset on mobile doesn't account for the fixed navbar height. Fix it and make sure desktop behaviour is unchanged.

GitHub Actions will pick it up immediately and the agent will start working. You’ll see a new workflow run appear under the Actions tab of your repository — first queued, then in progress.

The more context you give in the @claude comment, the better — especially if the issue description itself is sparse.
5. The Agent at Work
Once triggered, the agent goes through a predictable loop: understand → plan → act → commit.
What happens under the hood
- Read the issue — title, description, and all comments.
- Explore the repository — navigates the file tree, reads relevant files, builds a mental model of the codebase.
- Plan the fix — reasons about the approach before writing any code.
- Write the code — makes targeted edits to the files identified in the plan.
- Commit to a new branch — the branch is named automatically (e.g.
claude/issue-2-20260318-1250).
When it’s done, Claude posts a summary comment on the issue showing the steps it took, what it changed, and a Create PR link.

In this case Claude identified that .hero__title was rendering as a block element without explicit text alignment, causing the text to fall back to the browser default (left) on mobile. It added a single text-align: center declaration. Clean and scoped.
A note on the Create PR step
In the default configuration, Claude prepares the branch and commit but leaves the final PR creation to you. This is intentional — you stay in control of what gets proposed for review. Click Create PR → in the comment and GitHub pre-fills the title and description.
6. Reviewing the Pull Request
Once created, the PR looks like any other in your repository.

What to look for
The description — Claude writes a clear PR description: what the problem was, what it changed, and why. If the description is vague, look more carefully at the diff.
The diff — is the change scoped to the problem? Here it’s one line in one file — exactly what was asked.
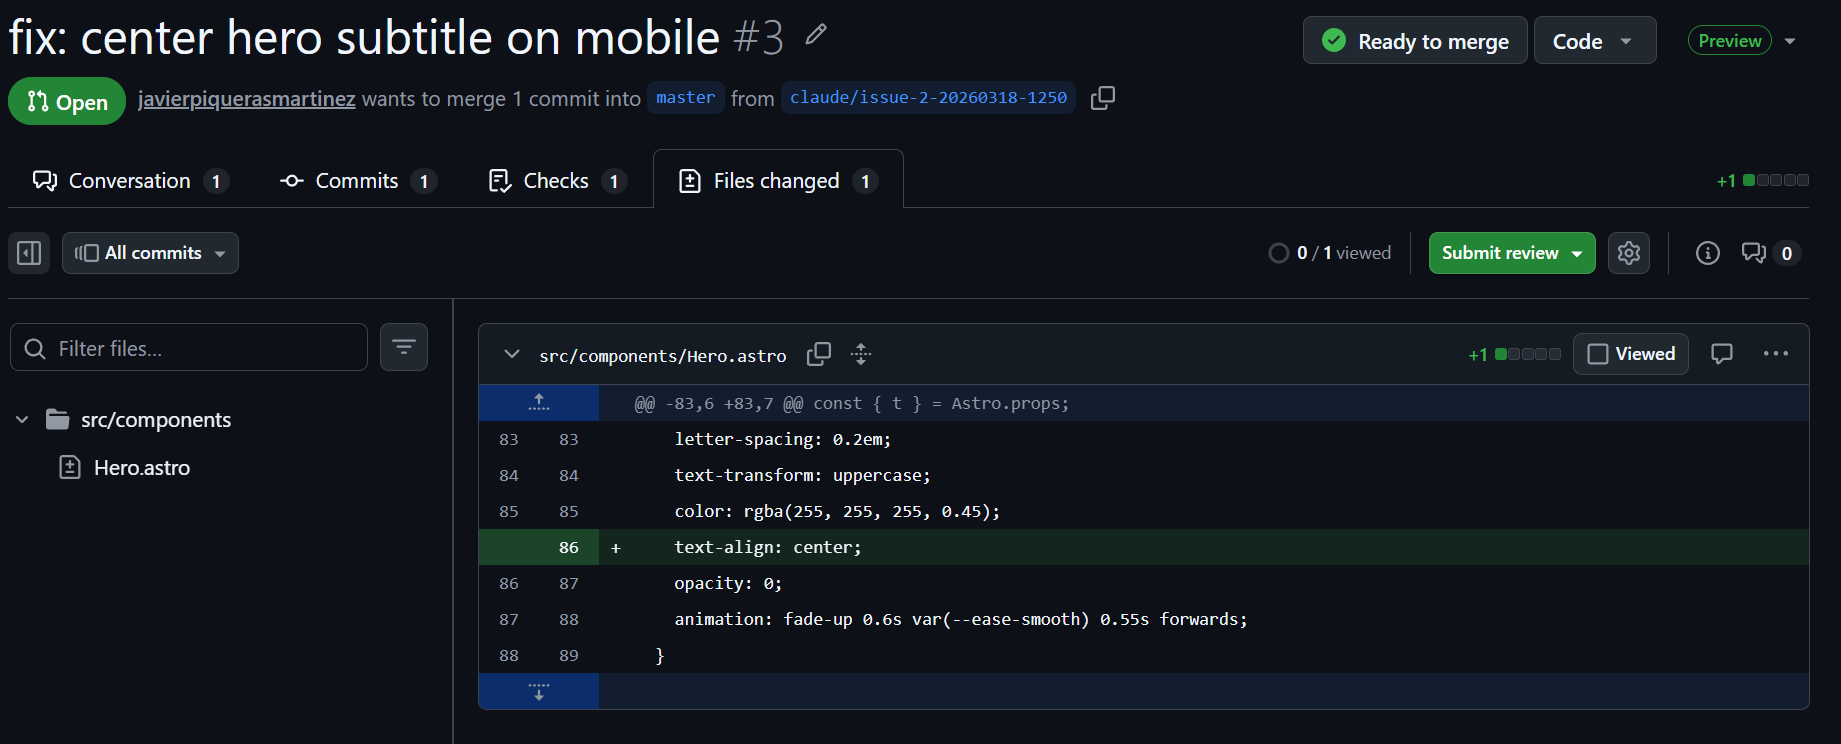
Tests — if your project has tests, check whether the agent added or updated them. If it didn’t, consider adding them before merging.
Before you merge
Run through this quick checklist:
- The PR description matches what was asked in the issue
- The diff is scoped — no unrelated changes
- The fix looks correct on a quick read
- CI passes (if you have it configured)
- You’re happy to put your name on it
If everything looks good, merge. If you want changes, leave a review comment on the PR — the agent can pick up the feedback and push a new commit.

7. Conclusion
What did we just do?
We went from a GitHub issue to a merged fix without opening our editor, cloning the repo, or running a single command locally. The agent read the code, understood the problem, wrote a scoped fix, and handed it to us for review.
This is not magic. The agent made the same moves a developer would — it just did them faster and without needing a local environment. Your job shifted from writing the fix to reviewing the fix. That’s a meaningful change.
When does this approach make sense?
Remote agents work best for tasks that are:
- Well-scoped — a single bug, a small refactor, a specific feature with clear acceptance criteria
- Self-contained — the fix doesn’t require understanding months of context that isn’t written down anywhere
- Reviewable — you have the knowledge to evaluate the output
They’re less suited for exploratory work (“improve the performance”), tasks that require live interaction with the running app, or anything where the requirements are still being figured out.
For those, local agents — or just writing the code yourself — are still the right tool.
This is the third post in a series on working with AI agents. You can read the previous entries: AI-Driven Development and AI Agents in Development.